Introduction
Origin and Popularity of Ice Cream Cakes
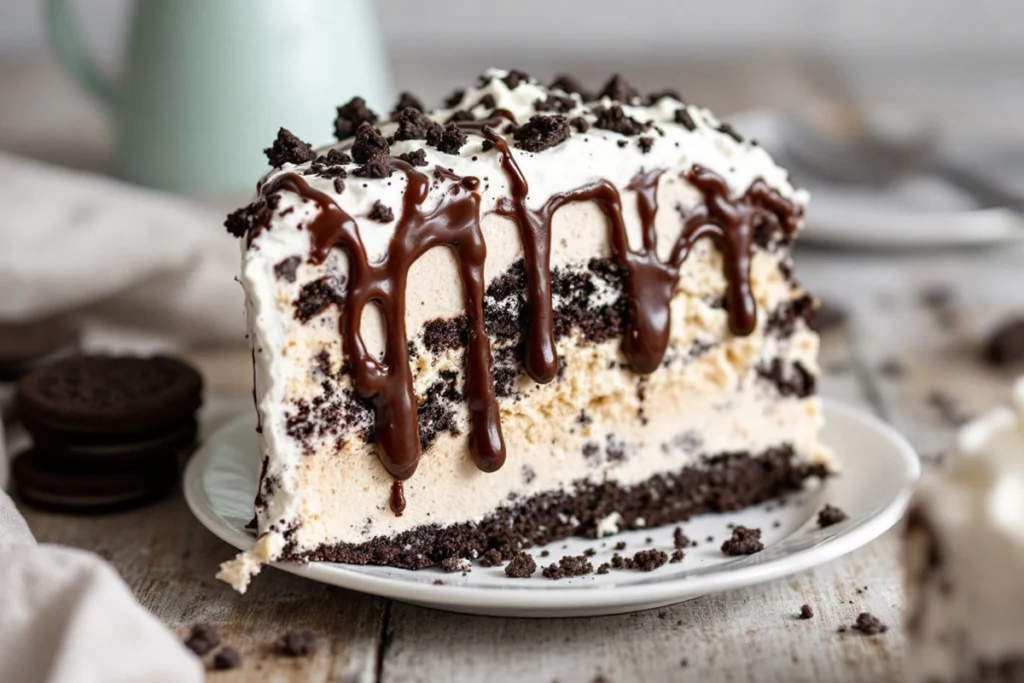
Homemade Oreo Ice Cream Cake have been a staple in celebratory desserts since their introduction in the 20th century, combining the creaminess of ice cream with the structure of a cake. Popularized by ice cream parlors, they became a go-to treat for birthdays and other special events.
Oreo’s Role in Desserts
Oreo cookies are a beloved ingredient in many desserts, thanks to their iconic chocolate wafers and sweet cream filling. Their versatility makes them a perfect choice for ice cream cakes, adding crunch, flavor, and visual appeal to the layers.
Why It’s Perfect for Special Occasions
An Homemade Oreo Ice Cream Cake is a crowd-pleaser for any celebration. Its rich layers of ice cream, crushed Oreos, and whipped topping cater to both kids and adults. The frozen treat is especially refreshing during warm-weather events, making it a go-to choice for summer gatherings.
Key Ingredients
Oreo Cookies (Classic or Double-Stuf)
Oreo cookies are the star ingredient, providing the cake with texture and a rich chocolatey flavor. Classic Oreos work well for a balanced sweetness, while Double-Stuf Oreos add extra creaminess. You can also experiment with flavored Oreos for a unique twist.
Ice Cream: Vanilla, Chocolate, or Other Flavors
The ice cream is the foundation of the cake. Vanilla and chocolate are classic choices, but you can customize the cake with flavors like cookies and cream, mint chocolate chip, or strawberry. For a multi-flavored cake, layer two or more ice cream varieties.
Whipped Topping or Frosting Options
Whipped topping is a popular choice for finishing the cake, as it’s light, creamy, and easy to spread. For a richer option, use buttercream or cream cheese frosting. Garnish the top with crushed Oreos, chocolate syrup, or sprinkles for a festive touch.
Equipment Needed
Springform Pan or Cake Pan
A springform pan is ideal for making an Oreo ice cream cake, as it allows for easy removal and neat presentation. If you don’t have one, a regular cake pan works too—just line it with plastic wrap or parchment paper for easier release.
Plastic Wrap or Parchment Paper
Line your pan with plastic wrap or parchment paper to prevent the cake from sticking and to simplify transferring it to a serving plate. This step is especially helpful when using a standard cake pan.
Mixing Bowls and Spatula
You’ll need mixing bowls to combine ingredients like crushed Oreos and melted butter for the crust. A sturdy spatula is essential for spreading ice cream layers and whipped topping evenly, ensuring a polished look.
Preparing the Cookie Crust
Crushing the Oreos
Place Oreo cookies in a food processor and pulse until they form fine crumbs. If you don’t have a processor, put the cookies in a resealable plastic bag and crush them with a rolling pin. For a chunkier crust, leave a few larger pieces intact.
Combining with Butter or Chocolate Sauce
Transfer the crushed Oreos to a mixing bowl and stir in melted butter or chocolate sauce. The butter helps bind the crumbs together, while chocolate sauce adds extra flavor. Adjust the amount to achieve a moist, sand-like consistency.
Pressing and Chilling the Crust
Press the Oreo mixture firmly into the bottom of the prepared pan, creating an even layer. Use the back of a spoon or a flat-bottomed glass to compact it. Chill the crust in the freezer for at least 15 minutes to set before adding the ice cream layers.
Layering the Ice Cream
Softening the Ice Cream
Before layering, allow the ice cream to soften at room temperature for about 10-15 minutes. It should be soft enough to spread easily but not melted. This ensures smooth layers without breaking the crust or creating uneven patches.
Spreading Evenly on the Crust
Spoon the softened ice cream onto the chilled Oreo crust. Use a spatula to spread it into an even layer, smoothing out any air pockets. Work quickly to prevent the ice cream from melting too much before returning it to the freezer.
Adding Oreo Pieces for Extra Crunch
For added texture and flavor, sprinkle crushed or chopped Oreo pieces over the ice cream layer. Gently press them into the ice cream to keep them in place. This step creates a delightful crunch that complements the creamy layers.
Adding a Second Flavor or Swirl
Creating a Two-Layer Ice Cream Cake
If you’re using two ice cream flavors, freeze the first layer until firm (about 30-45 minutes) before adding the second. This prevents the layers from blending together, ensuring distinct colors and flavors.
Using Fudge, Caramel, or Fruit Swirls
Add extra flair by swirling fudge, caramel, or fruit sauces between the ice cream layers. Drizzle the sauce over the first layer and use a knife to create a marbled effect before adding the next layer of ice cream.
Tips for Flavor Combinations
Pair complementary flavors for a balanced dessert. Classic combinations include vanilla and chocolate, cookies and cream with mint chocolate chip, or strawberry with cheesecake ice cream. Experiment with your favorites to make the cake uniquely yours.
Freezing and Setting the Cake
Proper Freezing Times
After assembling your layers, freeze the cake for at least 4-6 hours or until firm. For the best results, consider freezing it overnight. This ensures the layers are fully set and the cake holds its shape when sliced.
Avoiding Ice Crystals
To prevent ice crystals from forming, cover the cake tightly with plastic wrap or aluminum foil. Ensure the freezer temperature remains constant, and avoid opening the freezer frequently while the cake is setting.
Checking Consistency Before the Next Step
Before decorating, check that the cake is firm to the touch. The ice cream layers should feel solid, making it easier to apply toppings without melting or collapsing. If the cake is too soft, return it to the freezer until it reaches the right consistency.
Decorating and Topping the Cake
Whipped Cream vs. Ganache
Choose a topping that complements your cake. Whipped cream provides a light, fluffy finish, perfect for balancing the richness of the ice cream and Oreos. For a more indulgent option, pour a smooth chocolate ganache over the top, letting it drip down the sides for a dramatic effect.
Drizzling with Chocolate, Caramel, or Peanut Butter Sauce
Drizzle chocolate, caramel, or peanut butter sauce over the cake for extra flavor and visual appeal. Use a squeeze bottle or spoon to create decorative patterns or let the sauces flow naturally for a rustic look.
Garnishing with Crushed Oreos or Sprinkles
Complete your cake with a generous sprinkling of crushed Oreos, adding texture and crunch. For a festive touch, add colorful sprinkles, mini chocolate chips, or chopped nuts. Arrange whole Oreos around the edges or on top for an elegant finishing touch.
Step-by-Step Recipe for Homemade Oreo Ice Cream Cake
Detailed Instructions
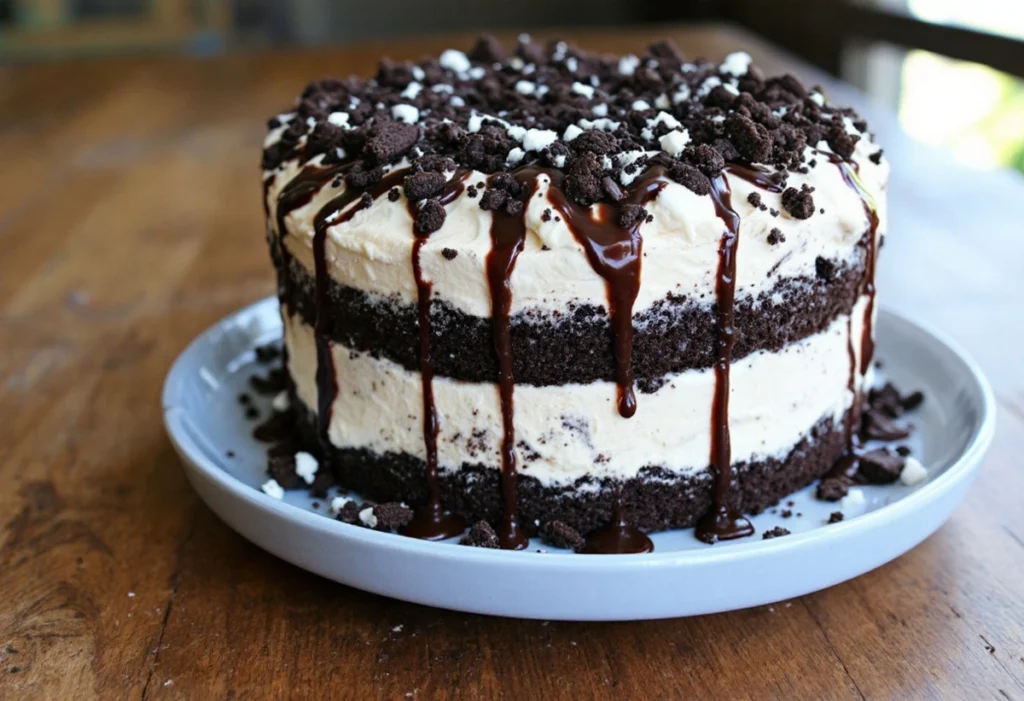
- Prepare the Crust: Crush Oreo cookies into fine crumbs and mix with melted butter. Press the mixture into a lined springform pan, forming an even layer. Freeze for 15-20 minutes to set.
- Layer the Ice Cream: Soften the ice cream and spread a thick, even layer over the crust. Add crushed Oreo pieces for extra crunch, if desired. Freeze for 30-45 minutes until firm.
- Add Additional Layers: For a second layer, repeat the process with another ice cream flavor. You can also add a swirl of caramel or fudge between layers for extra flavor. Freeze until solid.
- Top and Decorate: Cover the cake with whipped cream or ganache. Garnish with crushed Oreos, chocolate drizzle, or sprinkles for the finishing touch. Return the cake to the freezer until ready to serve.
- Serve: Remove the cake from the pan, slice with a sharp knife warmed in hot water, and enjoy immediately.
Timing and Temperature Tips
- Soften ice cream just enough to spread without melting completely.
- Freeze each layer thoroughly before adding the next to maintain distinct layers.
- Keep the freezer temperature steady to avoid softening or ice crystal formation.
Customizing for Personal Preferences
Personalize your Oreo ice cream cake with your favorite ice cream flavors, sauces, and toppings. You can even add a layer of brownie or cookie dough for extra decadence.
Variations of Oreo Ice Cream Cake
Mint Chocolate Oreo Cake
Combine mint chocolate chip ice cream with layers of crushed Oreos and drizzle with fudge sauce. The cool mint and rich chocolate create a refreshing and indulgent dessert.
Peanut Butter and Oreo Combo
Add a layer of peanut butter ice cream and drizzle with peanut butter sauce for a nutty twist. Top with crushed Reese’s Pieces or mini peanut butter cups for added flavor.
Oreo Cheesecake Ice Cream Variation
Use Oreo cheesecake ice cream for a rich, creamy variation. Incorporate a layer of cream cheese frosting or a swirl of cheesecake filling between layers for a tangy complement to the chocolatey Oreos.
Tips and Tricks for a Perfect Oreo Ice Cream Cake
Ensuring a Firm Crust
To ensure your crust holds together, mix the crushed Oreos with enough melted butter to create a moist, sand-like consistency. Press the mixture firmly into the pan using the back of a spoon or a flat-bottomed glass. Chill the crust thoroughly before adding the ice cream layers to prevent it from crumbling.
Achieving Smooth, Even Layers
Allow the ice cream to soften just enough to spread easily but not melt. Use a spatula or the back of a spoon to create smooth, even layers. Chill each layer until firm before adding the next to maintain clean, distinct layers.
Transporting and Serving Suggestions
If transporting the cake, keep it in an insulated cooler with ice packs to ensure it stays frozen. When serving, dip a sharp knife in hot water and wipe it dry between slices for clean, precise cuts.
Serving Suggestions
Slicing and Plating for Parties
Slice the cake into even portions and place each slice on a chilled dessert plate to prevent melting. Garnish with a drizzle of chocolate sauce, a dollop of whipped cream, or a sprinkle of crushed Oreos for a polished presentation.
Pairing with Coffee, Tea, or Milk
The rich flavors of an Oreo ice cream cake pair beautifully with a hot cup of coffee or tea, balancing the sweetness. A cold glass of milk is also a classic choice, especially for kids and those who enjoy a creamy complement.
Adding Fresh Fruit on the Side
Serve fresh fruit, such as strawberries, raspberries, or sliced bananas, alongside the cake. The natural sweetness and slight tartness of the fruit provide a refreshing contrast to the rich ice cream and cookies.
Storing Leftovers
Proper Wrapping for Freezer Storage
Wrap leftover slices tightly in plastic wrap and then in aluminum foil to prevent freezer burn. Alternatively, place the slices in an airtight, freezer-safe container.
How Long It Keeps
Properly stored, Oreo ice cream cake can last up to 1-2 weeks in the freezer without significant loss of flavor or texture.
Re-Freezing Slices Without Losing Quality
If a slice begins to soften at room temperature, return it to the freezer immediately. Avoid leaving it out for too long to preserve the cake’s texture. Re-freezing is fine if the slice hasn’t melted significantly, but limit how often you re-freeze to maintain quality.
Frequently Asked Questions (FAQs)
Can I Make This Without a Springform Pan?
Yes! If you don’t have a springform pan, use a standard cake pan lined with plastic wrap or parchment paper. The lining allows you to lift the cake out easily after freezing. Alternatively, assemble the cake directly in a freezer-safe dish and serve it directly from the pan.
What If My Ice Cream Melts Too Quickly?
If your ice cream is melting too fast, place it back in the freezer for a few minutes to firm up. Work in small batches and spread each layer quickly. Keeping your workspace cool and working with partially softened ice cream helps maintain consistency.
How Do I Substitute Different Cookies?
You can substitute Oreos with other cookies, like chocolate chip, graham crackers, or digestive biscuits. For a twist, try flavored cookies like mint Oreos or peanut butter sandwich cookies to match your chosen ice cream flavor.
Can It Be Made Vegan or Dairy-Free?
Absolutely! Use dairy-free ice cream made from almond, coconut, or oat milk, and opt for vegan-friendly cookies. Replace whipped cream with a non-dairy whipped topping or coconut cream. Check ingredient labels to ensure all components align with dietary preferences.
How Far in Advance Can I Make It?
You can make the cake up to a week in advance. Wrap it tightly in plastic wrap or foil to prevent freezer burn, and store it in the freezer until ready to serve. Decorating can be done a day before serving for the freshest look.
What’s the Best Way to Cut It?
To cut the cake neatly, dip a sharp knife in hot water and wipe it dry between slices. This technique ensures clean cuts through the frozen layers. Let the cake sit at room temperature for 5 minutes if it’s too firm to slice immediately.
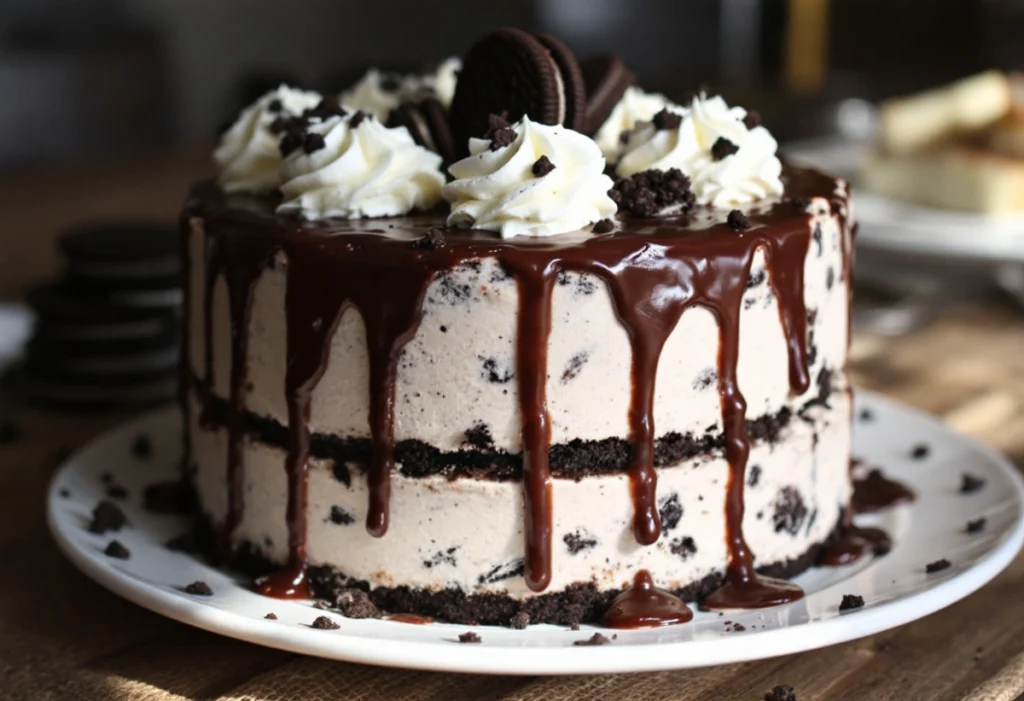
Homemade Oreo Ice Cream Cake is a delightful frozen dessert that combines layers of creamy ice cream, crunchy Oreo cookies, and whipped topping for a show-stopping treat. Perfect for birthdays or summer gatherings, this cake is as easy to make as it is delicious. For more dessert inspiration, check out Fluffy Buttermilk Biscuits Recipe or explore creative takes on cakes at OrgRecipes. Whether you’re new to baking or a seasoned pro, this dessert is a guaranteed crowd-pleaser.
Oreo Ice Cream Cakes Around the World
Global Adaptations and Local Flavors
Oreo ice cream cakes have gained global popularity, with adaptations reflecting regional preferences. In Japan, matcha (green tea) Oreos are a common ingredient, adding a unique earthy flavor to the cake. In Europe, variations often include rich chocolate or hazelnut spreads, while in tropical regions, flavors like mango or coconut are incorporated to complement the refreshing dessert.
Different Cookie Brands in Different Regions
While Oreos are widely available, local cookie brands often replace them in regional recipes. In the UK, chocolate Bourbons might be used, while in Australia, Tim Tams can serve as a delicious alternative. These local swaps allow for creative twists on the classic recipe.
Popularity of Ice Cream Cakes Internationally
Homemade Oreo Ice Cream Cake are beloved worldwide for their versatility and festive appeal. From birthday parties in the United States to elaborate wedding desserts in Asia, their ability to combine frozen treats with baked elements has made them a staple for celebrations across cultures.
Conclusion
Recap of the Fun, Easy Process
Making an Oreo ice cream cake at home is a simple yet rewarding process. With just a few ingredients, some layering, and freezing time, you can create a dessert that’s both visually appealing and deliciously indulgent.
Encouragement to Experiment with Flavors
The versatility of this cake invites endless experimentation. Try different ice cream flavors, sauces, and cookie combinations to make the recipe uniquely yours. Whether you prefer classic vanilla and chocolate or adventurous combinations like peanut butter and mint, the options are limitless.
Final Thoughts on Indulging in Homemade Oreo Ice Cream Cake
An Oreo ice cream cake is more than just a dessert—it’s a celebration of flavor, texture, and creativity. Perfect for any occasion, it’s a delightful treat that brings joy to both the maker and the eater. So, grab your favorite Oreos, unleash your imagination, and enjoy the satisfaction of crafting this frosty masterpiece.
Viral Tuna Salad: 5 Bold Reasons Matthew McConaughey’s Recipe Wins
Healthy Homemade Chicken Mortadella
Chicken Mortadella changed my deli game forever. I used to stare at processed meat…
The BEST Taco Pasta
When I’m short on time and need to get a satisfying dinner on…
Classic German Kartoffelpuffer Recipe (Authentic, Crispy & Easy to Make)
Easy Butter Pecan Cookies Recipe
There’s something undeniably comforting about the scent of buttery, nutty cookies wafting from…
Perfect Strawberry Cheesecake Recipe
If there’s one dessert that’s guaranteed to silence a lively room, it’s this…





2 thoughts on “Homemade Oreo Ice Cream Cake”