Introduction
What Are Custom Cookies?
Custom cookies are personalized treats crafted to fit specific themes, flavors, or occasions. These cookies go beyond the basic to feature unique designs, decorations, and flavors that reflect creativity and individual preferences.
Why Make Custom Cookies at Home?
Making custom cookies at home allows you to experiment with designs, flavors, and decorations while enjoying the satisfaction of creating something truly unique. It’s also a cost-effective way to prepare gifts, party favors, or themed treats.
Occasions Perfect for Custom Cookies
Custom cookies are ideal for celebrating holidays, birthdays, weddings, baby showers, and more. They also make thoughtful gifts and are perfect for themed events or simply indulging in a creative baking session.
Ingredients for Custom Cookies
Basic Ingredients for Cookie Dough
The foundation of any cookie recipe starts with these staples:
- Flour: All-purpose flour works best for most cookie recipes.
- Sugar: A mix of granulated sugar and brown sugar adds sweetness and texture.
- Butter: Unsalted butter creates a rich, tender dough.
- Eggs: Provide structure and bind the ingredients.
- Vanilla Extract: Adds a warm, sweet aroma.
- Leavening Agents: Baking powder or baking soda for light, airy cookies.
Choosing Add-Ins: Chocolate Chips, Nuts, or Dried Fruits
Enhance your cookie dough with a variety of add-ins:
- Chocolate Chips: Choose semi-sweet, milk, dark, or white chocolate.
- Nuts: Add crunch with chopped almonds, walnuts, or pecans.
- Dried Fruits: Include raisins, cranberries, or apricots for a chewy, fruity twist.
Special Ingredients for Personalized Flavors
Experiment with unique ingredients to create custom flavors:
- Citrus Zest: Lemon, orange, or lime zest for a fresh, tangy flavor.
- Spices: Cinnamon, nutmeg, or ginger for warmth and depth.
- Extracts: Almond, mint, or coconut extract for distinctive tastes.
Step-by-Step Instructions for Custom Cookies
Basic Cookie Dough Ingredients
1 cup (230g) unsalted butter, softened
1 cup (200g) granulated sugar
½ cup (100g) brown sugar, packed
2 large eggs
1 teaspoon vanilla extract
2 ½ cups (315g) all-purpose flour
1 teaspoon baking soda
½ teaspoon baking powder
½ teaspoon salt
Customization Ideas
- Mix-ins: Chocolate chips, nuts, dried fruit, sprinkles, pretzels, crushed candy, or oats.
- Flavors: Add cinnamon, cocoa powder, citrus zest, or espresso powder.
- Decorations: Frosting, icing, melted chocolate, or edible glitter.
Step-by-Step Instructions
Step 1: Preheat the Oven
Preheat your oven to 350°F (175°C). Line a baking sheet with parchment paper or a silicone mat.
Step 2: Cream Butter and Sugars
In a large mixing bowl, beat together:
- 1 cup softened butter
- 1 cup granulated sugar
- ½ cup brown sugar
Mix until light and fluffy (about 2–3 minutes).
Step 3: Add Wet Ingredients
Beat in:
- 2 large eggs
- 1 teaspoon vanilla extract
Mix until fully combined.
Step 4: Combine Dry Ingredients
In a separate bowl, whisk together:
- 2 ½ cups flour
- 1 teaspoon baking soda
- ½ teaspoon baking powder
- ½ teaspoon salt
Step 5: Mix Wet and Dry Ingredients
Gradually add the dry ingredients to the wet ingredients, mixing until just combined.
Step 6: Add Custom Mix-ins
Fold in your choice of mix-ins (e.g., chocolate chips, nuts, or sprinkles). Be creative!
Step 7: Shape the Cookies
Scoop the dough into rounded tablespoons and place them on the prepared baking sheet, leaving space between each cookie. Flatten slightly if desired.
Step 8: Bake
Bake for 10–12 minutes, or until the edges are golden brown. The centers may look slightly underbaked but will firm up as they cool.
Step 9: Cool
Let the cookies cool on the baking sheet for 5 minutes, then transfer them to a wire rack to cool completely.
Step 10: Decorate (Optional)
Once cooled, decorate your cookies with frosting, icing, melted chocolate, or sprinkles. Let the decorations set before serving.
Tips for Customization
- For chewy cookies, use more brown sugar than granulated sugar.
- For crispy cookies, use more granulated sugar and bake a little longer.
- Add 1–2 tablespoons of cornstarch to the dough for softer cookies.
- Experiment with extracts like almond, lemon, or peppermint for unique flavors.
Decorating Custom Cookies
Basic Icing Techniques: Royal Icing and Buttercream
- Royal Icing: Ideal for intricate designs and hardening to a smooth finish.
- Buttercream: A softer option for spreading or piping borders and patterns.
Adding Colors and Patterns
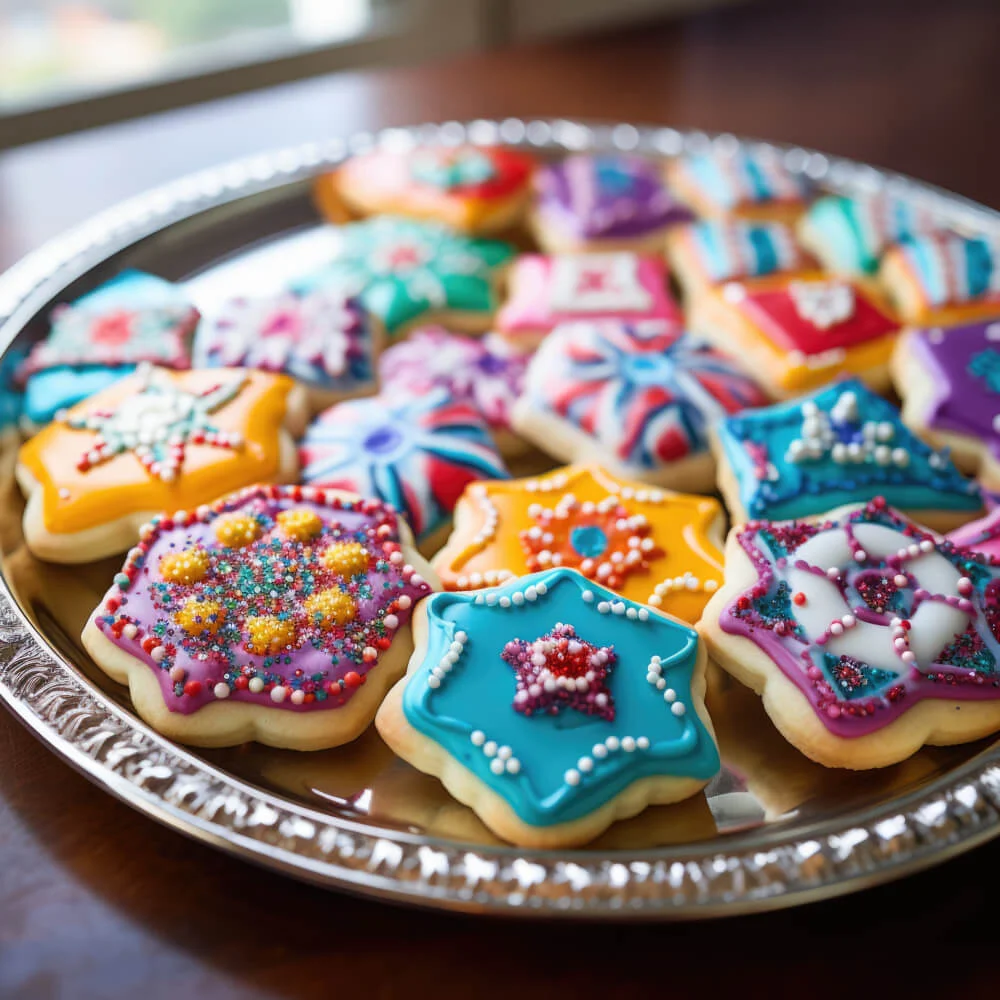
- Use gel food coloring for vibrant hues.
- Create patterns like stripes, swirls, or polka dots with icing or edible markers.
Using Fondant, Sprinkles, and Edible Decorations
- Roll out fondant for a smooth, polished look.
- Add sprinkles, edible glitter, or candy pearls for extra flair.
Flavor Variations for Custom Cookies
Classic Vanilla and Chocolate Cookies
Stick to the basics with classic vanilla or rich chocolate cookie dough as your base.
Lemon Zest and Lavender Cookies
Combine lemon zest with a hint of lavender for a fragrant, delicate flavor.
Spiced Ginger and Cinnamon Cookies
Warm spices like ginger and cinnamon are perfect for holiday-themed cookies.
Gluten-Free and Vegan Options
Substitute flour with almond or gluten-free flour, use flaxseed meal as an egg replacement, and replace butter with coconut oil for dietary-friendly cookies.
Designing Themes for Custom Cookies
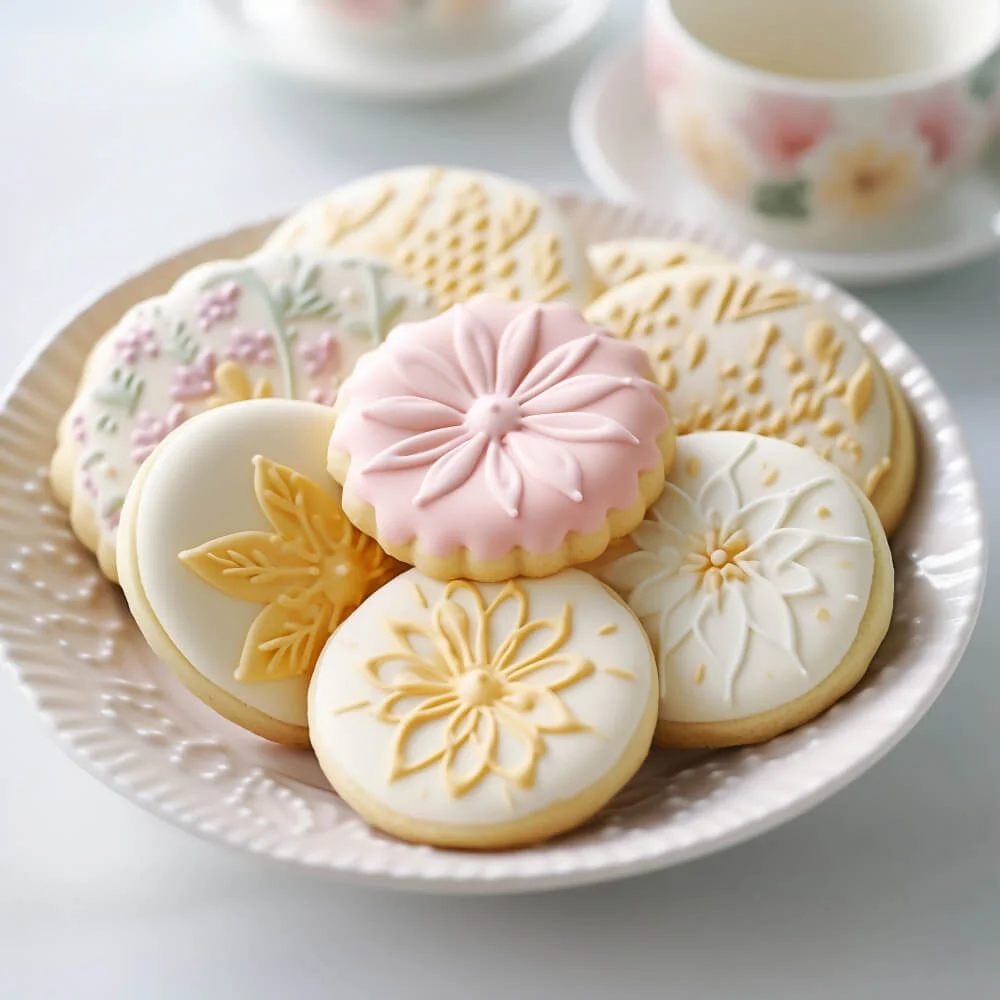
Seasonal Themes: Christmas, Halloween, and Easter
- Christmas: Snowflakes, Christmas trees, and candy cane designs.
- Halloween: Pumpkins, ghosts, and spiderweb patterns.
- Easter: Pastel-colored eggs, bunnies, and flowers.
Special Occasions: Weddings, Birthdays, and Baby Showers
- Weddings: Monogrammed cookies or elegant floral designs.
- Birthdays: Add age numbers, balloons, or party hats.
- Baby Showers: Decorate with baby bottles, rattles, or pastel hues.
Personalized Cookies with Names, Dates, or Messages
- Write names, special dates, or short messages using icing or edible pens for a truly personal touch.
Tips for Perfect Custom Cookies
Achieving the Perfect Dough Consistency
- Measure Precisely: Use a kitchen scale or measuring cups for accurate ingredient proportions.
- Chill the Dough: Refrigerate the dough for at least 30 minutes before rolling to make it easier to handle and reduce stickiness.
- Avoid Overmixing: Once the flour is added, mix until just combined to prevent tough cookies.
- Adjust Texture: If the dough is too soft, add a little more flour. If it’s too dry, add a tablespoon of milk or water.
Preventing Cookies from Spreading During Baking
- Chill Again After Shaping: Place shaped cookies in the refrigerator or freezer for 10-15 minutes before baking to help retain their shape.
- Use Parchment Paper: Line baking sheets with parchment paper or silicone mats to prevent sticking and ensure even baking.
- Don’t Over grease the Pan: Too much grease can cause cookies to spread. Use parchment paper instead of greasing the pan.
- Monitor Oven Temperature: Use an oven thermometer to ensure accurate temperature, as overheating can lead to excessive spreading.
Best Tools for Shaping and Decorating
- Cookie Cutters: Invest in a variety of cookie cutters for different shapes and themes.
- Rolling Pins: A nonstick or adjustable rolling pin ensures even dough thickness.
- Piping Bags and Tips: Use piping bags with various tips for intricate icing designs.
- Edible Markers: Perfect for writing messages or adding fine details to your cookies.
- Fondant Tools: Rollers and embossers make decorating with fondant easier and more professional.
- Sprinkle Tweezers: Small tweezers help place sprinkles or tiny decorations with precision.
Serving Suggestions
Presenting Cookies in Gift Boxes or Platters
- Gift Boxes: Arrange cookies in decorative gift boxes with parchment or tissue paper to cushion them. Add a ribbon or tag for a personal touch.
- Platters: Use themed platters or tiered trays to display cookies for parties or events. Arrange by shape, color, or flavor for a visually appealing presentation.
- Individual Packaging: Wrap cookies in clear cellophane bags tied with colorful ribbons, making them perfect for party favors or small gifts.
Pairing Custom Cookies with Drinks Like Milk or Tea
- Classic Pairing: Serve cookies with a cold glass of milk for a nostalgic treat that’s always a hit.
- Tea Time: Pair cookies with herbal, green, or black tea for a sophisticated touch, especially with citrus or spiced cookie flavors.
- Coffee Lovers: Complement rich chocolate or nutty cookies with a latte, cappuccino, or espresso.
- Hot Chocolate: For festive gatherings, pair custom cookies with hot chocolate topped with whipped cream or marshmallows.
Creating Cookie Bouquets for Unique Gifting
- Stick and Shape: Attach sticks to the back of cookies using royal icing or bake the sticks directly into the cookies for stability.
- Arrange in Containers: Place the cookies in a decorative pot, mug, or small basket filled with foam or tissue paper to hold them upright.
- Add Accents: Decorate the bouquet with ribbons, tissue paper, or small notes to make it even more special.
- Themes: Customize cookie bouquets for birthdays, holidays, or baby showers by using themed shapes and colors.
FAQs About Custom Cookies
Can I Freeze the Dough for Later Use?
Yes, cookie dough freezes well for up to 3 months. Wrap the dough tightly in plastic wrap, then place it in an airtight container or freezer bag. Thaw in the refrigerator before rolling and baking.
What’s the Best Way to Store Decorated Cookies?
Store decorated cookies in an airtight container, layering them with parchment paper to prevent smudging. Keep them at room temperature in a cool, dry place for optimal freshness.
How Long Do Custom Cookies Stay Fresh?
Custom cookies typically stay fresh for 5-7 days when stored properly in an airtight container. Refrigerating them can extend their freshness but may affect the texture of the icing.
Can I Use Natural Food Coloring for Icing?
Yes, natural food coloring can be made from ingredients like beet juice, matcha, turmeric, or blueberry powder. These options are perfect for creating subtle hues without artificial additives.
Are Custom Cookies Safe for Kids with Allergies?
Custom cookies can be made allergy-friendly by substituting common allergens like nuts, dairy, or gluten with safe alternatives. Always double-check labels and inform consumers of potential allergens in your recipe.
What Is a Custom Cookie?
A custom cookie is a personalized treat made with unique designs, themes, or flavors. They are often decorated with icing, fondant, or edible decorations to match specific occasions or preferences.
Why Are Custom Cookies So Expensive?
Custom cookies are priced higher due to the time, skill, and specialized materials required for intricate designs and decorations. The customization process often involves hand-crafted details, making each cookie unique.
How Big Are Custom Oreos?
Custom Oreos are typically the same size as standard Oreos, about 1.75 inches in diameter. However, the addition of decorations or coatings can make them appear larger.
Can I Modify My Cookies?
Yes, cookies can be modified to suit dietary needs or flavor preferences. You can adjust ingredients, substitute flours, or experiment with mix-ins and toppings to create a unique version of your favorite recipe.
Conclusion
Why Custom Cookies Are a Creative and Fun Baking Option
Custom cookies are more than just treats—they’re an opportunity to express creativity and personalize your baking. Whether you’re crafting intricate designs for special occasions or experimenting with unique flavor combinations, custom cookies bring joy to both the baker and the recipient. They’re perfect for celebrating milestones, impressing guests, or simply enjoying a fun baking project.
Encouragement to Experiment with Designs and Flavors
Don’t hesitate to let your imagination run wild! Try new decorations, mix in unexpected flavors, and tailor your cookies to fit specific themes or preferences. From seasonal motifs to personalized messages, the possibilities are endless. Embrace the process, share your creations with loved ones, and enjoy the satisfaction of making something delicious and uniquely yours. Custom cookies are the perfect canvas for your culinary artistry!
While the sitemap from the provided link does not contain specific content on “custom cookies,” you can explore the Org Recipes website for general baking tips and creative inspiration. Their section on Earl Grey Cookies offers insights into crafting unique cookies, which could be adapted for personalized designs and flavors. This resource could help you customize your own cookie recipes with specialized ingredients and techniques to suit any occasion.
Viral Tuna Salad: 5 Bold Reasons Matthew McConaughey’s Recipe Wins
Healthy Homemade Chicken Mortadella
Chicken Mortadella changed my deli game forever. I used to stare at processed meat…
The BEST Taco Pasta
When I’m short on time and need to get a satisfying dinner on…
Classic German Kartoffelpuffer Recipe (Authentic, Crispy & Easy to Make)
Easy Butter Pecan Cookies Recipe
There’s something undeniably comforting about the scent of buttery, nutty cookies wafting from…
Perfect Strawberry Cheesecake Recipe
If there’s one dessert that’s guaranteed to silence a lively room, it’s this…


